前言
归纳总结一些简单的常用的命令;
man
答应出 Linux 命令的可读帮助文档;
section
通常,一个命令的帮助文档会包含很多的 section,通过 man + section 的方式给出,而 section 通常使以数字表示,section 的描述如下,1
2
3
4
5
6
7
8
9
10
111 用户命令, 可由任何人启动的。
2 系统调用, 即由内核提供的函数。
3 例程, 即库函数。
4 设备, 即/dev目录下的特殊文件。
5 文件格式描述, 例如/etc/passwd。
6 游戏, 不用解释啦!
7 杂项, 例如宏命令包、惯例等。
8 系统管理员工具, 只能由root启动。
9 其他(Linux特定的), 用来存放内核例行程序的文档。
n 新文档, 可能要移到更适合的领域。
o 老文档, 可能会在一段期限内保留。
这里以 crontab 为例,描述一下,它的 man page 是如何展示的,
如果我只需要知道它的命令格式,那么使用 man 1 即可
1
2
3
4
5
6
7
8
9
10
11
12
13
14
15
16
17
18
19
20
21
22
23
24
25
26
27
28
29
30
31
32
33
34
35
36
37
38
39CRONTAB(1) BSD General Commands Manual CRONTAB(1)
NAME
crontab -- maintain crontab files for individual users (V3)
SYNOPSIS
crontab [-u user] file
crontab [-u user] { -l | -r | -e }
DESCRIPTION
The crontab utility is the program used to install, deinstall or list the tables used to drive the cron(8) daemon in Vixie Cron. Each user can have their own crontab, and they are not intended to be edited directly.
(Darwin note: Although cron(8) and crontab(5) are officially supported under Darwin, their functionality has been absorbed into launchd(8), which provides a more flexible way of automatically executing commands. See launchctl(1) for more
information.)
If the /usr/lib/cron/cron.allow file exists, then you must be listed therein in order to be allowed to use this command. If the /usr/lib/cron/cron.allow file does not exist but the /usr/lib/cron/cron.deny file does exist, then you must
not be listed in the /usr/lib/cron/cron.deny file in order to use this command. If neither of these files exists, then depending on site-dependent configuration parameters, only the super user will be allowed to use this command, or all
users will be able to use this command. The format of these files is one username per line, with no leading or trailing whitespace. Lines of other formats will be ignored, and so can be used for comments.
The first form of this command is used to install a new crontab from some named file or standard input if the pseudo-filename `-' is given.
The following options are available:
-u Specify the name of the user whose crontab is to be tweaked. If this option is not given, crontab examines ``your'' crontab, i.e., the crontab of the person executing the command. Note that su(1) can confuse crontab and that if
you are running inside of su(1) you should always use the -u option for safety's sake.
-l Display the current crontab on standard output.
-r Remove the current crontab.
-e Edit the current crontab using the editor specified by the VISUAL or EDITOR environment variables. The specified editor must edit the file in place; any editor that unlinks the file and recreates it cannot be used. After you exit
from the editor, the modified crontab will be installed automatically.
FILES
/usr/lib/cron/cron.allow
/usr/lib/cron/cron.deny
DIAGNOSTICS
......如果我们需要知道它的详细使用方式,那么使用 man 5,
1
2
3
4
5
6
7
8
9
10
11
12
13
14
15
16
17
18
19
20
21
22
23
24
25
26
27
28
29
30
31
32
33
34
35
36
37
38
39
40
41
42
43
44
45
46
47
48
49CRONTAB(5) BSD File Formats Manual CRONTAB(5)
NAME
crontab -- tables for driving cron
DESCRIPTION
A crontab file contains instructions to the cron(8) daemon of the general form: ``run this command at this time on this date''. Each user has their own crontab, and commands in any given crontab will be executed as the user who owns the
crontab. Uucp and News will usually have their own crontabs, eliminating
......
Several environment variables are set up automatically by the cron(8) daemon. SHELL is set to /bin/sh, and LOGNAME and HOME are set from the /etc/passwd line of the crontab's owner. HOME and SHELL may be overridden by settings in the
crontab; LOGNAME may not.
(Another note: the LOGNAME variable is sometimes called USER on BSD systems... On these systems, USER will be set also).
In addition to LOGNAME, HOME, and SHELL, cron(8) will look at MAILTO if it has any reason to send mail as a result of running commands in ``this'' crontab. If MAILTO is defined (and non-empty), mail is sent to the user so named. If
MAILTO is defined but empty (MAILTO=""), no mail will be sent. Otherwise mail is sent to the owner of the crontab. This option is useful if you decide on /bin/mail instead of /usr/lib/sendmail as your mailer when you install cron --
/bin/mail does not do aliasing, and UUCP usually does not read its mail.
The format of a cron command is very much the V7 standard, with a number of upward-compatible extensions. Each line has five time and date fields, followed by a user name (with optional ``:<group>'' and ``/<login-class>'' suffixes) if
this is the system crontab file, followed by a command. Commands are executed by cron(8) when the minute, hour, and month of year fields match the current time, and when at least one of the two day fields (day of month, or day of week)
matches the current time (see ``Note'' below). cron(8) examines cron entries once every minute. The time and date fields are:
field allowed values
----- --------------
minute 0-59
hour 0-23
day of month 1-31
month 1-12 (or names, see below)
day of week 0-7 (0 or 7 is Sun, or use names)
A field may be an asterisk (*), which always stands for ``first-last''.
......
Instead of the first five fields, one of eight special strings may appear:
string meaning
------ -------
@reboot Run once, at startup.
@yearly Run once a year, "0 0 1 1 *".
@annually (same as @yearly)
@monthly Run once a month, "0 0 1 * *".
@weekly Run once a week, "0 0 * * 0".
@daily Run once a day, "0 0 * * *".
@midnight (same as @daily)
@hourly Run once an hour, "0 * * * *".
......
find
命令释疑
命令格式
find 的命令格式,
1 | find pathname -options [-print -exec -ok ...] |
options
-name
按照文件名查找文件。-perm
按照文件权限来查找文件。-prune
使用这一选项可以使 find 命令不在当前指定的目录中查找,如果同时使用 -depth 选项,那么 -prune 将被 find 命令忽略。-user
按照文件所有者来查找文件。-group
按照文件所属的组来查找文件。-mtime -n +n
按照文件的更改时间来查找文件, -n 表示文件更改时间距现在 n 天以内,+n 表示文件更改时间距现在 n 天以前。看一个例子,在当前用户 /home 路径中查找一天以内所创建的所有文件,1
2
3
4
5
6
7
8
9$ find ~/ -mtime -1
/Users/mac//Library/Mail/V4/MailData/BackupTOC.plist
/Users/mac//Library/Mail/V4/MailData/DefaultCounts
/Users/mac//Library/Mail/V4/MailData/Envelope Index
/Users/mac//Library/Mail/V4/MailData/Envelope Index-shm
/Users/mac//Library/Mail/V4/MailData/Envelope Index-wal
/Users/mac//Library/Mail/V4/MailData/ExternalUpdates.storedata-shm
/Users/mac//Library/Mail/V4/MailData/MessageUidsAlreadyDownloaded3-shm
...还有一系列相似的命令,
-amin n
查找系统中最后N分钟访问的文件1
$ find ~/ -amin 10
-atime n
查找系统中最后n24小时访问的文件- -cmin n
查找系统中最后N分钟被改变文件状态的文件 - -ctime n
查找系统中最后n24小时被改变文件状态的文件 - -mmin n
查找系统中最后N分钟被改变文件数据的文件 - -mtime n
查找系统中最后n*24小时被改变文件数据的文件
-nogroup
查找无有效所属组的文件,即该文件所属的组在/etc/groups中不存在。-nouser
查找无有效属主的文件,即该文件的属主在/etc/passwd中不存在。-newer file1 ! file2
查找更改时间比文件file1新但比文件file2旧的文件。-type
查找某一类型的文件,诸如:
b - 块设备文件。
d - 目录。
c - 字符设备文件。
p - 管道文件。
l - 符号链接文件。
f - 普通文件。-size n:[c]
查找文件长度为n块的文件,带有c时表示文件长度以字节计。-depth:在查找文件时,首先查找当前目录中的文件,然后再在其子目录中查找。-fstype:
查找位于某一类型文件系统中的文件,这些文件系统类型通常可以在配置文件/etc/fstab中找到,该配置文件中包含了本系统中有关文件系统的信息。-mount:
在查找文件时不跨越文件系统mount点。-follow:
如果find命令遇到符号链接文件,就跟踪至链接所指向的文件。-cpio:
对匹配的文件使用cpio命令,将这些文件备份到磁带设备中。
命令参数
- -print
find命令将匹配的文件输出到标准输出。 - -exec:
find命令对匹配的文件执行该参数所给出的shell命令。相应命令的形式为’command’ { } \;,注意{ }和\;之间的空格。 - -ok:
和-exec的作用相同,只不过以一种更为安全的模式来执行该参数所给出的shell命令,在执行每一个命令之前,都会给出提示,让用户来确定是否执行。
用例
找文件
在根路径中通过文件名查找 scrapy.cfg 文件;
1 | $ find / -name "scrapy.cfg" |
可以看到,执行过程中通常会遇到 Permission denied 的错误;为了避免这样的错误,
1 | $ sudo find / -name "scrapy.cfg" |
如果想要模糊匹配,直接使用
1 | $ sudo find / -name "scrapy*" |
找内容
在当前路径下的 public 文件包中去找包含 banner.jpg 字符串的文件1
find public -type f -name "*" | xargs grep "banner.jpg"
执行的逻辑是,在当前目录 public 中去查找所有任意的文件,然后将找到的文件通过 xargs 管道命令再通过 grep 命令去匹配所要查找的文本内容,这里是 banner.jpg;
输出结果,可见在 style.css 中包含该内容1
public/css/style.css: background: url("../img/banner.jpg") center #2ca6cb;
有时候会遇到 xargs unterminiated quote 这样的错误,是因为文件名有 xargs 不能识别的非法字符单引号,解决办法1
find . -type f -name "*" -print0 | xargs -0 grep "2.7.1/MathJax.js"
The -print0 argument tells find to use the NULL character to terminate each name that it prints out. The -0 argument tells xargs that its input tokens are NULL-terminated. This avoids issues with characters that otherwise would be treated as special, like quotes.
https://stackoverflow.com/questions/11649872/getting-error-xargs-unterminated-quote-when-tried-to-print-the-number-of-lines
mv
移动文件夹的子内容
1 | /usr/share/nginx# ls |
将 public 文件夹中的子内容移动到 html 中,使用*符号,1
/usr/share/nginx# mv public/* html
gzip
如何在不解压的情况下输出文本内容
1 | > gzip -dc myfile.gz | grep abc |
cron
查看 记录 MacOS 的使用日常记录 中有关 cron 章节的系统介绍;
locale
查看本地字符集
1 | $ locale -a |
上面便罗列除了所支持的所有字符集,可见,并不支持中文;
查看本地所支持的字符集
1 | $ locale -m |
1 | $ locale -m | grep GB2312 |
查看 Linux 系统是否已经支持你想要的字符集;如果已经包含,则无需重新下载;
安装中文字符集 GB2312
一般而言,推荐系统使用 UTF-8 编码来显示中文,但是前提是,中文必须是使用 UTF-8 进行编码的;但是,现在大多数文件、文件名使用的仍然是 GB2312 进行编码的,所以采用 UTF-8 的系统对 GB2312 编码的中文显示是乱码,文件名则形如 ?????.pdf;这个时候,我们需要将系统默认的编码格式设置为 GB2312 以便能够正确的对中文字符进行解码;
Ubuntu
我使用的是 Ubuntu 16.04 版本的阿里云操作系统;通常,如果本地 Linux 系统没有开启中文字符集,那么以 GBK 或者 GB2312 编码的中文字符,在系统中是不能被识别的;
检查本地是否已经安装了中文字符集,
1
$ locale -a
如果没有出现 GB2312 表示还没有安装中文字符集;
检查本地系统已经支持中文字符集,
1
2$ locale -m | grep GB2312
GB2312可以看到,本地是支持我想要的中文字符集的;
让系统生成 GB2312 字符集
添加支持1
sudo vi /var/lib/locales/supported.d/cn
添加如下内容,
1
2zh_CN.GBK GBK
zh_CN.GB2312 GB2312让后让系统生成相应的字符集,这一步非常的关键,它的目的就是从 /var/lib/locales/supported.d/ 目录中的所有文件中读取配置并在当前系统中生成相应的 locale 的字符集和编码数据;
1
2
3
4
5
6
7
8
9
10
11
12
13
14
15
16
17
18
19
20
21
22
23$ sudo locale-gen
[sudo] password for shangyang:
Generating locales (this might take a while)...
en_AG.UTF-8... done
en_AU.UTF-8... done
en_BW.UTF-8... done
en_CA.UTF-8... done
en_DK.UTF-8... done
en_GB.UTF-8... done
en_HK.UTF-8... done
en_IE.UTF-8... done
en_IN.UTF-8... done
en_NG.UTF-8... done
en_NZ.UTF-8... done
en_PH.UTF-8... done
en_SG.UTF-8... done
en_US.UTF-8... done
en_ZA.UTF-8... done
en_ZM.UTF-8... done
en_ZW.UTF-8... done
zh_CN.GB2312... done
zh_CN.GBK... done
Generation complete.这样,当前系统便有了 GB2312 和 GBK 的编码数据和格式,但是,此时的系统依然不能识别中文字符,是因为用户没有在环境变量中启动它;
配置环境变量使用中文字符集
配置的方式有两种,一种是全局的配置,一种是为当前的用户配置,在实际操作过程当中,笔者倾向于后者;全局的配置方式
1
$ vim /etc/default/locale
添加如下的内容
1
2LANG="zh_CN.GB2312"
LC_ALL="zh_CN.GB2312"然后执行
1
sudo locale-gen
当前用户的配置方式
1
2
3$ vim ~/.profile
LANG="zh_CN.GB2312"
LC_ALL="zh_CN.GB2312"这样,便完成了对本地环境变量的配置,注意一般而言,若配置了当前用户的环境变量,就无须配置全局的环境变量了;然后,执行如下命令,使得当前用户的环境变量立刻生效,
1
$ source ~/.profile
检查 locale 是否生效,使用 locale 或者 locale -a 命令进行检查;
1
2
3
4
5
6
7
8
9
10
11
12
13
14
15
16$ locale
LANG=zh_CN.GB2312
LANGUAGE=zh_CN:zh:en_US:en
LC_CTYPE="zh_CN.GB2312"
LC_NUMERIC="zh_CN.GB2312"
LC_TIME="zh_CN.GB2312"
LC_COLLATE="zh_CN.GB2312"
LC_MONETARY="zh_CN.GB2312"
LC_MESSAGES="zh_CN.GB2312"
LC_PAPER="zh_CN.GB2312"
LC_NAME="zh_CN.GB2312"
LC_ADDRESS="zh_CN.GB2312"
LC_TELEPHONE="zh_CN.GB2312"
LC_MEASUREMENT="zh_CN.GB2312"
LC_IDENTIFICATION="zh_CN.GB2312"
LC_ALL=可见当前系统已经使用 GB2312 作为主要编码了;不过,虽然系统支持 GB2312 的中文编码了,但是你的 Terminal 未必能够正确的显示,这个时候,同样需要设置 Terminal 的编码格式;
将 Terminal 的编码设置为 GB2312
这里以 iTerm 终端为例,从菜单栏中,选中 Session -> Edit Session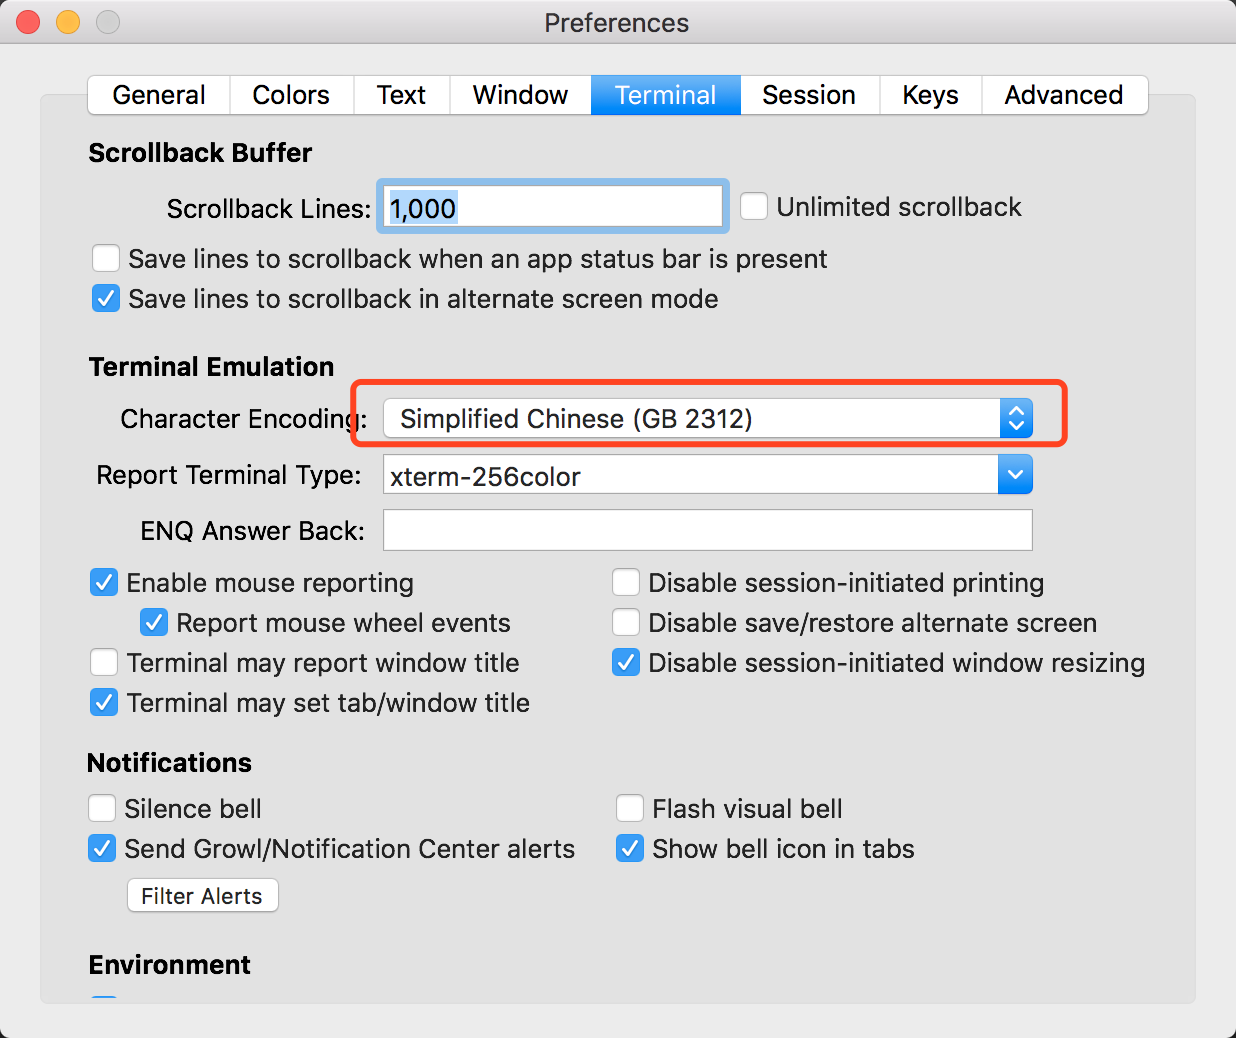
到这里,你的系统就支持显示以 GB2312 编码的中文了;
tty
http://blog.chinaunix.net/uid-8194676-id-2513202.html
用户操作
添加用户
添加用户名
1
$ sudo adduser someone
加入 sudoers
1
$ sudo visudo
将 someone 加入 sudoers,
创建开发组 dev
1
$ sudo groupadd dev
将 someone 加入 dev 组
1
$ sudo usermod -a -G dev someone
检查
1
2$ cat /etc/passwd # 查看用户是否创建成功
$ cat /etc/group # 查看用户是否已经成功添加入组
上述命令在 Centos 和 Ubuntu 上测试通过;
删除用户
1 | $ sudo userdel someone |
该命令并不会删除用户的目录;或者使用 deluser,和 userdel 等价
1 | $ sudo userdel -r someone |
连同目录一起删除;
上述命令在 Ubuntu 上测试通过
输入输出重定向
输出重定向
> 表示输出重定向
command > file,表示,由 command 所产生的标准输出内容输出到 file;注意,该命令会清空 file 的内容再输出
>> 表示以追加的方式重定向输出
command >> file,表示,将 command 所产生的标准输出内容以追加的方式输出到 file;注意,该命令不会清空原有文件内容,而是将新增内容追加在末尾;
输入重定向
< 表示输入重定向
command < file,表示,将 file 的内容作为标准输入,输入到 command 中;如果不设置 <,那么标准输入是从键盘中输入的;
<< 表示将标记之间的内容作为标准输入
command << tag 表示将标记 tag 之间的内容作为输入,其作用就是,方便在命令行中进行多行输入,看一个例子,
1 | $ cat << EOF |
回车,输出,1
2
3欢迎来到
美丽新世界
you are welcom!
可以看到,<< 可以非常方便的在命令行中进行多行的输入操作;
标准输入输出 STDIN/STDOUT/STDERR
Linux 系统中,分别为文件描述符 0-2 定义了如下规则,
| 文件描述符 | 作用 | Cool |
|---|---|---|
| 0 | STDIN | 标注输入 |
| 1 | STDOUT | 标准输出 |
| 2 | STDERR | 标准错误输出 |
如果要引用标准输入输出文件,需要使用地址描述符 &,比如,我需要引用标准输出的文件,使用&1,但是如果只是引用其输出而非文件,直接在 command 写 1 即可;
标准输入输出重定向
如果我们需要将某个命令的错误输出合并到标准输出,并输出到指定文件中,怎么操作呢?1
command > file 2>&1
注意,file 一定要写在前面,将上面的命令进行分布剖析
- command > file
该步骤表示,将 command 的标准输出重定向到 file 中,表示,当前的 stdout 已经由 file 表示,那么如果我们要引用这个 stdout 文件描述符,使用 &1 即可;这里要注意的核心要点是,&1 还是标注输出描述符,只是写入它的内容被重定向到了 file 中,仅此而已; command > file 2>&1
2 > &1 表示,将错误标准输出流重定向到 &1 中;而步骤 #1 中,已经将输入到 &1 的输出重定向到了 file,因此,这里,标准错误输出,同样也会输出到 file 中,因此 file 中的内容就同时包含了标准输出和标准错误输出了;那么可不可以直接将标准错误输出直接输出到 file 中呢?比如 command > file 2>file,答案是可行的,这样标准输出和标准错误输出也都会同时输出到 file 中,但是,这样做不够效率,而且如果在频繁的写入情况下面,可能还会发生文件锁的竞争,因为同时开启了两个写入数据流重定向到一个 file 中;所以,最佳的做法仍然是,将标准错误输出同时重定向到 &1 中,再由 &1 统一将标准输出和标准错误输出统一重定向到 file 中,这样,file 的写入流始终只有一个;所以 command > file 2>&1 是最佳实践的结果;
背后的原理
先从一个问题入手,上面的重定向命令,为什么不可以写成呢?1
command 2>&1 > file
答案是不可以的,如果这样写,你会发现,错误信息输出到了控制台,而标准输出内容反而从控制台重定向到了 file 中;怎么会这样呢?如果照字面意思理解,首先,将标准错误信息输出到标准输出,然后将标准输出重定向到 file 中,所以,标准输出和标注错误输出都会输出到 file 中;可,为什么偏偏不是这样的呢?
其实,如果只从字面意思理解,是永远不知道为何的,这得从 linux 内核如何编译上面这段指令和执行的过程来理解了,用 trace 跟踪执行,
如果执行命令是 command > file 2>&1,linux 内核中解析执行的命令是,
1
2
3open(file) == 3
dup2(3,1)
dup2(1,2)如果执行命令是 command 2>&1 > file,linux 内核中解析执行的命令是,
1
2
3dup2(1,2)
open(file) == 3
dup2(3,1)
眨眼一看,不都差不多嘛?只是 dup2(1,2) 和 dup(3,1) 的执行顺序颠倒了,殊不知,这个颠倒是致命的;
- 先来看 command > file 2>&1 的执行过程,首先,执行的是 dup2(3,1),表示的是,将所有输出到 &1 既表示的控制台的标准输出流拦截,并重定向到文件 file 也就是 &3 中,而后,dup2(1,2) 表示把所有标准错误输出流重定向到 &1 也就是控制台上,但是,因为前面 dup2(3,1) 已经对标准输出流进行了拦截并重定向到 file 既 &3 中,所以,这个时候,标准错误输出会同样被拦截,并输出到 file 中;
- 再来看 command 2>&1 > file 的执行顺序,首先,dup2(1,2) 是将标准错误流(由 2 表示)拦截并重定向输出,输出到哪?
立刻输出到的是控制台 &1;然后执行 dup2(3,1),拦截标准输出流并重定向到了文件既 &3 中;所以,结果就是,标准错误流输出到了控制台,而标注输出流输出到了文件;
注意,这里有个核心的要点就是,标准输出 1 被拦截的顺序,像1
2dup2(3,1)
dup2(1,2)
1 标准输出流一开始就被拦截了,所以,任何重定向给 &1 的视为发送给标准输出流的,所以 2 会被拦截并重定向;而如果 1 之后被拦截,情况是完全不同的,比如,1
2dup2(1,2)
dup2(3,1)
那么因为一开始 1 并没有被拦截,所以,dup2(1,2) 只是简单的将标准错误输出输出到了控制台,而当执行到 dup2(3,1) 的时候,才开始拦截 1,但这个时候,也只能将当前的标准输出重定向到文件 &3 中;注意 dup2(1,2) 表示的是拦截 2 的输出到控制台 &1(注,这里表达式的 1 表示的是 &1 控制台),而已经显示在控制台上的内容就不再是数据流了,因此已经被 dup2(1,2) 重定向并已经输出到控制台 &1 的 STDERR 不再会也不可能会再次作为 dup2(3,1) 的标准输出了,而是只有当 command 新产生的 STDOUT 才会被拦截并输出到 3 中;
nohup
将一个 shell 命令至于后台执行,格式1
nohup Command [ Arg ... ] [ & ]
固定格式1
nohup ... &
例子,
1 | nohup jenkins > /path/to/out.log 2>&1 & |
执行命令 jenkins 并将 STDOUT 和 STDERR 输出到 /path/to/out.log;注意,如果这里没有进行重定向输出,日志将会输出到当前目录中的 nohup.out,
注意,
nohup 有个限制,就是 nohup 后必须马上接可执行命令,否则报错,比如
1 | nohup NODE_ENV=DEV node ... & |
上述命令会报错,因为 NODE_ENV 并不是一个可执行的命令;如何修改呢?可以将 NODE_ENV=DEV node … 部分写入一个可执行的 shell 文件中,绕开这个错误;
查看文件大小
df
df是查看整个磁盘大小的;
du
du可以查看某个文件或者文件夹的大小
1 | $ du -h resources/test/images/ |