前言
hexo 官网地址 https://hexo.io/zh-cn/
本博文主要记录作者自己在使用 hexo 的一些关键操作记录,以便备忘;
hexo 页面布局
hexo 的页面由四个部分组成
- header
- side-bars
- footer
- body
如图所示,

Themes 主题是如何对应这四个部分的
layout.ejs
页面被访问时都会使用 layout.ejs 模板来进行渲染;/hexo-demo/themes/landscape/layout/layout.ejs
1 | <%- partial('_partial/head') %> |
header、side-bars、footer
- header -> layout/_partial/head.ejs
- partial(‘_partial/head’)
/hexo-demo/themes/landscape/layout/partial/head.ejs - partial(‘_partial/header’, null, {cache: !config.relative_link})
/hexo-demo/themes/landscape/layout/partial/header.ejs
- partial(‘_partial/head’)
- side-bars -> layout/_partial/sidebar.ejs
- partial(‘_partial/sidebar’, null, {cache: !config.relative_link}) %>
/hexo-demo/themes/landscape/layout/partial/sidebar.ejs
- partial(‘_partial/sidebar’, null, {cache: !config.relative_link}) %>
footer -> layout/_partial/footer.ejs
- partial(‘_partial/footer’, null, {cache: !config.relative_link})
<%- partial(‘_partial/after-footer’) %>
可见,header、side-bars 和 footer 使用的都是 _partial 路径中的通用局部模板。
那 body 呢?
1 | <section id="main"><%- body %></section> |
这是什么东西?<%- body %>
这其实就单纯的是就一个占位符,会被 post.ejs、index.ejs、category.ejs、tag.ejs 填充
- post.ejs ->
/hexo-demo/themes/landscape/layout/post.ejs
对应每一篇博文,( 通过 hexo new post yourblog 来生成的 ) - index.ejs
/hexo-demo/themes/landscape/layout/index.ejs
对应首页 - category.ejs
/hexo-demo/themes/landscape/layout/category.ejs
对应分类部分 - 公共部分 - tag.ejs
/hexo-demo/themes/landscape/layout/tag.ejs
对应标签部分 - 公共部分

可见, body 是使用的 layout 根路径下的局部模板来进行的填充!
hexo 为什么这么来设计它的局部模板呢?
- layout/_partial/*.ejs
用来填充公用部分,重用部分,且很少被改动的部分! - layout/*.ejs
用来填充“主体部分”,既 body,并且此部分的模板可以根据自己的需要进行定制;
所以,hexo 不但将页面通过 ejs 模板进行了模块化,而且将模板根据 body 和 其它部分隔离开了,便于维护。
部署
github.io
如何通过 github 创建博客
hexo deploy to github
修改 _config.yml
1 | deploy: |
安装 git 插件
1 | $ npm install hexo-deployer-git --save |
deploy
1 | $ hexo generate --deploy |
.deploy_git
注意,使用这种方式,只会将 hexo 编译后生成的 html、css、js 等上传到 github.io 代码库中,并不会将本地的其它源码提交;
同时,在本地生成一个 .deploy_git 目录,表示是 hexo 专用的 git 库;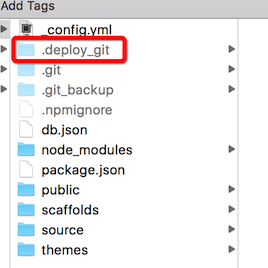
必要
注意,必须通过这种方式提交到 github.io 才能展示你的博客!
github
注意,hexo 只会将编译后生成的 html、css、javascript 提交到 github.io 的代码仓库中,并不会将本地的 hexo 源码提交。
所以,如果需要在多台机器上同步在本地更新博客,必须将源码提交到 github 上
创建一个新的 github 代码库
提交本地代码
1 | echo "# raw.github.io" >> README.md |
sftp
使用 sftp 将 hexo 博客部署到私有服务器上,这里我采用的是sftp的方式,官方的教程 https://hexo.io/docs/deployment.html#SFTP 里面的内容描述的较为简单;
修改该根目录中的 config.yml,添加如下内容
1 | deploy: |
然后,执行1
$ hexo generate --deploy
这样,便会将 generate 的内容自动部署到远程服务器上的 /home/shangyang/html/blog 目录中;在部署的过程中,会 uploaded 和 sync 并行
1 | file uploaded : fancybox/helpers/fancybox_buttons.png |
jacman 主题
安装
1 | cd hexo-demo |
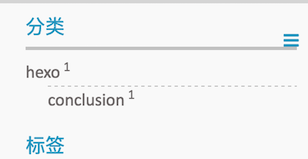
分类多级目录
修改模板
替换 layout/_widget/category.ejs 文件内容如下1
2
3
4
5
6<% if (site.categories.length){ %>
<div class="category-block">
<h3 class="asidetitle"><%= __('categories') %></h3>
<%- list_categories(site.categories) %>
</div>
<% } %>
使用内置函数 list_categries
添加样式
修改 jacman/source/css/_partial/aside.styl,在文件末尾增加如下内容1
2
3
4
5
6
7
8
9
10
11
12
13
14
15
16
17
18
19
20
21
22
23
24
25
26
27
28
29
30
31
32
33// categories
.category-block>ul>li
#border-bottom 1px solid #ccc
.category-block li
margin-bottom 8px
.category-list
@media mini
width 45%
float left
margin 0 5% 0 0
@media tablet
width 100%
float none
margin .5em 0 0
.categoriy-list-item
padding .5em 5%
.category-list-count
top -.5em
padding-left .3em
font-size 75%
line-height 0
position relative
vertical-align baseline
ul, ol, dl
list-style none
ul, ol, dl
// background-color #f9f9fa
margin-left 20px
// li
// border-bottom 1px dashed #ccc
.category-list-child
border-top 1px dashed #ccc
margin-bottom 8px
展示
更改字体
设置全局字体风格
修改 jacman/source/css/_base/variable.styl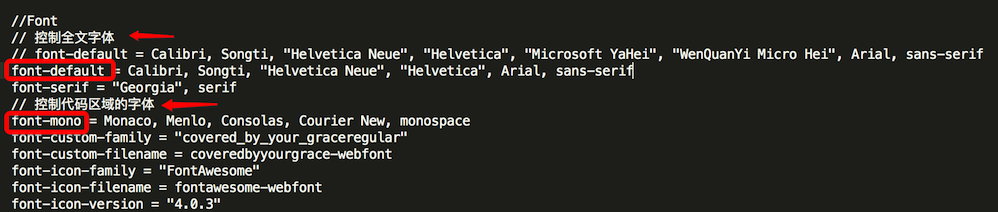
由于 jacman 默认的字体较大,所以,需要将其设置的小一点;
jacman/source/css/_base/public.styl
找到 body 元素,将其 font-size 更改为原来的 90%1
2
3
4
5
6
7
8
9
10
11
12body
background color-background
font-family font-default
//font-size font-size
font-size 90%
color color-font
line-height line-height
min-height: 100vh
display: -webkit-flex
display: flex
-webkit-flex-direction: column
flex-direction: column
jacman/source/css/_partial/helper.styl
找到 toc 元素,将其字体同样改为 90%1
2
3
4
5
6
7
8
9
10
11
12#toc
line-height 1.3em
//font-size 0.8em
font-size 90%
float right
.toc
padding 0
li
list-style-type none
.toc-child
padding-left 1.5em
padding-top 0
设置代码高亮风格
参考 jacman/source/css/_base/highlight 目录下的 theme.styl 和 highlight.styl,主要是 thme.styl 样式模板
theme.styl代码如下,
可见默认有两种代码高亮显示的风格,default 和 night
修改 jacmac/_config.yml, 设置你想要的风格1
2
3 代码高亮主题
available: default | night
highlight_theme: night
这里需要注意的是,“default”样式存在些问题,默认的样式使用灰底衬灰字,高亮显示的代码反而不高亮
不清晰,需要修改的地方是,将样式highlight-foreground改为black或者#2d2d2d
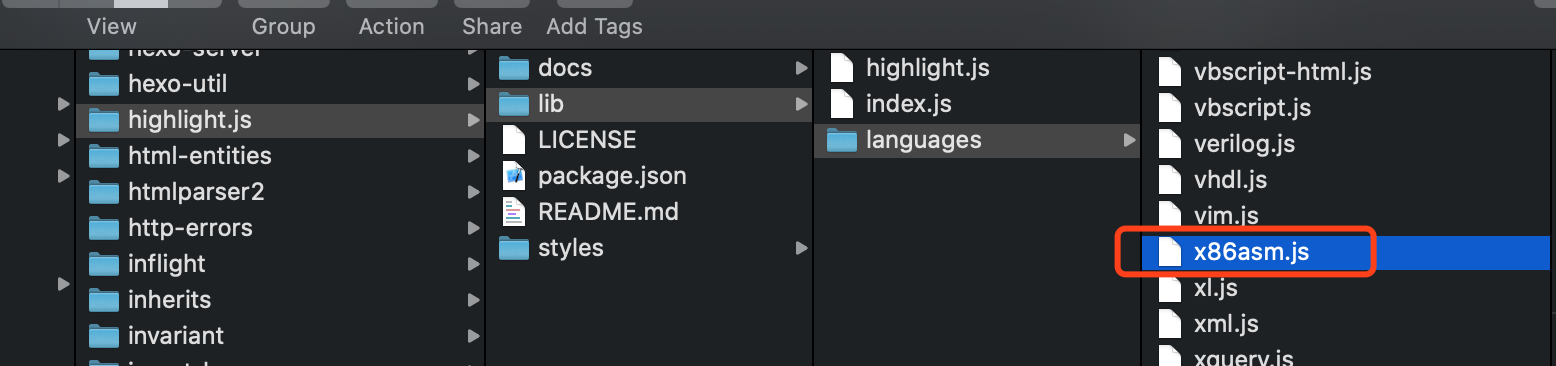
支持的高亮格式:http://highlightjs.readthedocs.io/en/latest/css-classes-reference.html
当找不到对应的代码的时候,比如之前找遍了 assembly 相关的关键字,写了 assembly,asm 就是不行,结果直接查找 node moudles 找到了对应的关键字 x86asm,
修改标题风格
如何调整 h1, h2, h3… 的样式?
修改 jacman/source/css/_partial/article.styl,调整为我像喜欢的风格后的样式如下,
1 | h1 |
bugs 修复
banner 在 github.io 上无法显示
修改 jacman 的 config.yml,启用自定义的 banner.jpg,1
2
3
4
5
6
7imglogo:
enable: true ## display image logo true/false.
src: img/logo.png ## `.svg` and `.png` are recommended,please put image into the theme folder `/jacman/source/img`.
favicon: img/favicon.ico ## size:32px*32px,`.ico` is recommended,please put image into the theme folder `/jacman/source/img`.
apple_icon: img/jacman.jpg ## size:114px*114px,please put image into the theme folder `/jacman/source/img`.
author_img: img/author.jpg ## size:220px*220px.display author avatar picture.if don't want to display,please don't set this.
banner_img: img/banner.jpg ## size:1920px*200px+. Banner Picture
设置以后,在本地上运行没问题,但是部署到 github 服务器上后,服务器上不能访问到 banner.jpg,最后定位到问题的原因在 css/style.css 文件中有关 banner.jpg 引用路径的问题,部署以后的 style.css 中使用的还是使用相对文件路径,../img/banner.jpg, 的方式来访问 banner.jpg 的,这就是问题的根源,所以,需要在 jacman 中修改其模板文件,对应的需要被修改的是 _source/css/_partial/header.styl_ 文件,将其第六行从相对路径 ../ 改为使用绝对路径 _/_ 即可;1
background url("/"+banner-img) center color-theme
然后重新发布;就可以在 github 上看到 banner 了;
打开评论
这里以使用多说为例,
多说
登录
- 不用注册,直接微信扫一扫就可以
创建 site
http://duoshuo.com/create-site
基本设置,得到二级域名
http://yourdomainname.duoshuo.com/admin/tools/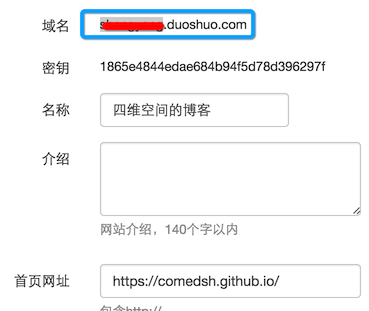
打开 jacman 多说评论设置
- 修改 jacman/_config.xml
1
2## Comment
duoshuo_shortname: yourdomainname ## 删除 duoshuo.com
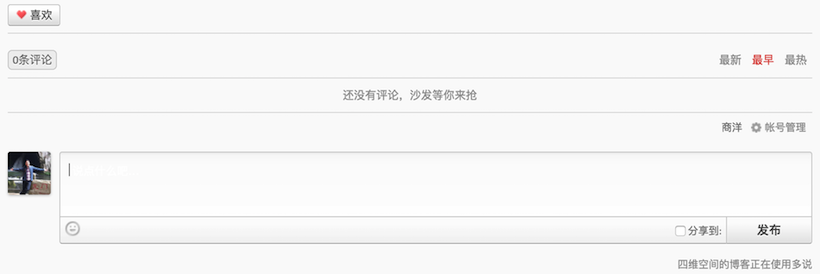
显示效果如图
畅言
参考 hexo 畅言
使用总结
生成 markdown 模板
默认使用 post 模板,生成 markdown 文件
(可以在 hexo-demo/_config.yml 中更改此默认的设置)1
hexo new your_blog_title
指定使用的模板生成 markdown 文件
1
hexo new [post|page|draft] your_blog_title
发布草稿
1
hexo publish your_blog_title
使用各自模板以后,markdown 文件的生成路径
/hexo-demo/source/_posts -> post 模板
/hexo-demo/source/_pages -> page 模板
/hexo-demo/source/_draft -> draft 模板
分享
分享的功能在路径 themes/jacman/layout/_partial/post/footer.ejs 中
使用图片
这里总结使用图片的三种方式,并记录各自的优缺点
全局图片
1 | {% img [class names] /path/to/image [width] [height] [title text [alt text]] %} |
首先,需要在目录 /hexo-demo/source/ 中创建一个文件夹 images
然后,把你的图片放置到该目录中,假设我们放置了一张图片 1.png,那么使用如下的方式引用图片
1 | {% img /images/1.png 50 50 这是一张测试图片 %} |
优点,
可以设置图片的大小;缺点
这时一种全局图片的引用,只能访问路径在 /hexo-demo/source/images 中的图片,不利于针对特有博客的特有图片的管理。
资源图片
为特定博客生成特定的图片;
修改 /hexo-demo/_config.yml,
将 post_asset_folder 设置为 true,
这样每次在执行 hexo new 生成博文 markdown 文件的时候,会自动生成 asset_folder,该 folder 便是用来存放资源图片的1
post_asset_folder: true
hexo new 生成博文
1
hexo new post new_blog
这样,我们在 hexo-demo/source/_post/ 目录中生成了 new_blog.md 以及一个 asset_folder,new_blog/,该 folder 就是用来存放该博客所特有的图片的,假设,我们放置了一张 1.png 图片到该资源目录中,那么可以使用如下的命令直接访问
访问该博文特有的图片
1
2
3{% asset_img slug [title] %}
访问 1.png
{% asset_img 1.png 这是一张测试图片 %}优点,
可以设置该博文所特有的图片;- 缺点,
不能调节图片的大小;
使用 ![]() HTML 标签
HTML 标签
假设图片是放在资源文件夹中( asset folder ),那么可以直接通过 HTML img 元素进行访问;1
<img src="1.png" width="50" height="50" />
- 优点
可以设置图片大小 - 缺点
博客首页,不能显示图片。因为这里的图片访问地址是通过博文的相对路径进行设置的,首页上不能访问。
使用附件
标准格式1
{% asset_path slug %}
特别特别注意的是,上述方式只会返回下载文件的相对路径字符串地址,比如返回的地址的字符串 /2017/03/10/javascript-frontend-amd-requirejs/sample-1.zip,所以,要转换成链接的方式,在 markdown 中插入如下片段即可,1
<a href="{% asset_path sample-1.zip %}">sample1.zip</a>
首页局部隐藏
默认情况下,首页会展示所有的博文信息,很不友好
修改 jacman/_config.yml,将 index.expand 设置为 false1
2
3index:
expand: false ## default is unexpanding,so you can only see the short description of each post.
excerpt_link: Read More
使用草稿
生成草稿
1 | $ hexo new draft "draft" |
强行预览草稿
更改配置文件1
render_drafts: true
或者1
$ hexo server --drafts
发布草稿
1 | $ hexo publish [layout] <filename> |
markdown sublime
hexo 加密
使用过程
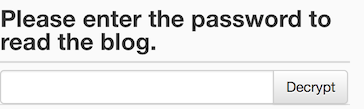
https://hexo.io/plugins/#security 可以对文章设置密码,只有回答正确才能访问
该模块安装完毕以后,会在 node_modules 中生成 hexo-blog-encrypt 目录;
按照上述的步骤,很容将博客通过一个密匙加密;在文本内容的标题栏中加入 password 关键字;但是,直接在 hexo 的文档中加入以后,会出现下面的问题,解密后,进入博客正文以后,发现目录栏位被替换了;
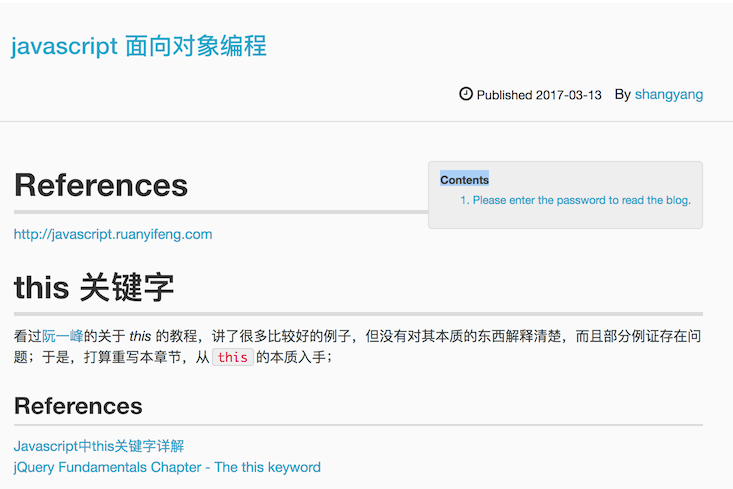
备注,这个问题只发生在使用了 jacman 的模板样式中;
hexo 正文内容是在 jacman/layout/_partial/post/article.ejs 模板中解析的;目录是在toc模板中解析的,如下,
1 | <div id="toc" class="toc-article"> |
因为,文档解析会首先通过模块 hexo-blog-encrypt 的 index.js (在 ./node_modules/hexo-blog-encrypt 目录中) 在服务器端先解释执行,会先于解析文档目录的模块执行,执行完成以后,它会把 item.content 设置为其加密的内容,然后,当执行到上述 article.ejs 的时候,就不能正常的通过 item.content 内容解析出目录结构了,因为 item.context 内容已经被加密了;所以,需要把 article.ejs 该成如下的内容,
1 | <div id="toc" class="toc-article" <% if (item.encrypt == true) { %> style="display:none" <% } %> > |
首先,如果启用了
加密,则先设置样式,隐藏toc元素,既是隐藏目录栏位然后,如果启用了
加密,则使用 item.origin 来解析目录,(从 index.js 的逻辑中可以知道,item.origin 保留了加密之前的文档内容);如果没有启用加密,则使用原本的 item.content 来解析文档目录;
备注:如何判断是否使用 hexo-blog-encrypt 加密,直接判断文本标题栏位是否使用 passworld 关键字;
Ok,原本以为一切搞定了,结果发现还是不能正常显示目录,后来发现,是当点击了页面 Decrypt 按钮以后,需要将 #1 隐藏的toc元素展示出来,才能够正确的显示目录;
点击 Decrypt 按钮将会触发 mcommon.js 中的 decryptAES() 方法,该方法实现的内容如下,
1 | function decryptAES() { |
发现,它错误的把将toc-div进行了展示,而我们的目录结构对应的元素是toc元素,所以修改上述代码,将其改为toc,如下,所述,
1 | if (document.getElementById("toc")) { |
发现还是不行,Ok,mcommon.js 文件有两份,一份是在 ./node_modules/hexo-blog-encrypt/lib 里面的,只修改这里是不会生效的;必须同时修改 ./public/ 目录中的 mcommon.js 文件。
Ok,这次解密以后,输出的文档格式是正确的了,包含了重要的目录结构。
加密原理
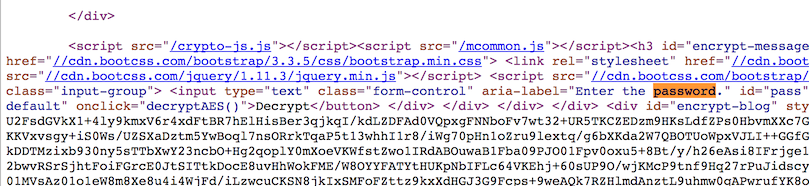
如图,将需要加密的正文内容(不包含目录)进行加密(通过 AES 进行加密),必须通过输入密匙才能解密;
开启 mathjax
hexo jacman 自带了 mathjax,不需要额外安装,只需要激活它即可,修改 _themes/jacman/config.yml
1 | mathjax: true #enable mathjax if true |
将属性 mathjax 设置为 true 即可;测试,
1 | $$x=\frac{-b\pm\sqrt{b^2-4ac}}{2a}$$ |
输出 $$x=\frac{-b\pm\sqrt{b^2-4ac}}{2a}$$
升级
最近,收到 mathjax 老服务器关闭的通知,1
2cdn.mathjax.org/mathjax/latest/MathJax.js?config=TeX-AMS-MML_HTMLorMML:32 WARNING: cdn.mathjax.org has been retired. Check https://www.mathjax.org/cdn-shutting-down/ for migration tips.
replaceScript @ cdn.mathjax.org/mathjax/latest/MathJax.js?config=TeX-AMS-MML_HTMLorMML:32
意味着老的 CDN 服务器不再提供支持,那么需要重新制定 CDN 服务器的地址,否者 mathjax 不能使用;那么如何更改呢?修改信息如下,1
themes/jacman//layout/_partial/mathjax.ejs:<script type="text/javascript" src="https://cdnjs.cloudflare.com/ajax/libs/mathjax/2.7.1/MathJax.js?config=TeX-AMS-MML_HTMLorMML">
修改 mathjax.ejs 中的 mathjax 的地址为 https://cdnjs.cloudflare.com/ajax/libs/mathjax/2.7.1/MathJax.js 参考 https://www.mathjax.org/cdn-shutting-down/ 升级以后,mathjax 的语法便能够正常的显示了;
mathjax 的基本语法
https://math.meta.stackexchange.com/questions/5020/mathjax-basic-tutorial-and-quick-reference
comedsh.github.io 不能显示
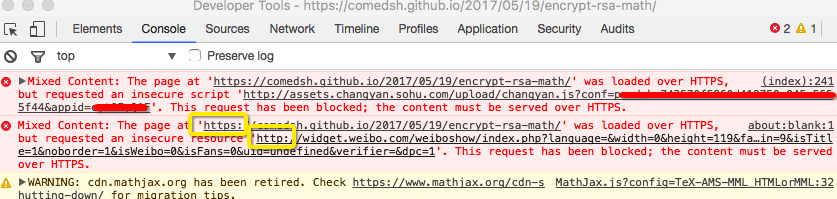
错误大致如上,因为我的博客的默认访问域名为 https,而导入 mathjax 的地址为 http://cdn.mathjax.org/mathjax/latest/MathJax.js?config=TeX-AMS-MML_HTMLorMML;所以导致不能显示,(注意,上图是已经被我修复之后的截图,但是仍然可以看到错误消息类型)
所以,更改的办法就是,修改文件,themes/jacman/layout/_partial/mathjax.ejs,将 http 改为 https
1 | <script type="text/javascript" src="https://cdn.mathjax.org/mathjax/latest/MathJax.js?config=TeX-AMS-MML_HTMLorMML" /> |
相应的将畅言,微博相关的错误同样改正过来;否则不能导入;
添加扫码信息
添加路径 _/themes/jacman/layout/_partial/post/footer.ejs_
添加备案信息
在 _/themes/jacman/layout/_partial/footer.ejs_ 文件中添加备案信息;这个文件正好是整个页面的最底部内容;
添加访问记录
采用不蒜子, http://ibruce.info/2015/04/04/busuanzi/
在 _/themes/jacman/layout/_partial/footer.ejs_ 既是整个网站的页脚添加 site view 的信息
1
2
3
4
5
6
7
8<!-- 不蒜子添加 Site View 开始-->
<script async src="//dn-lbstatics.qbox.me/busuanzi/2.3/busuanzi.pure.mini.js"></script>
<p class="copyright" style="margin-bottom:15px">
<span id="busuanzi_container_site_pv" style="font-family: 宋体">
本站总访问量 <span id="busuanzi_value_site_pv" style="color: #2ca6cb"></span> 次
</span>
</p>在 _/themes/jacman/layout/partial/post/header.ejs 既是 published by who 的右边添加博文被访问的计数
1
2
3<span id="busuanzi_container_page_pv">
本文总阅读量<span id="busuanzi_value_page_pv"></span>次
</span>
搜索引擎收录
百度
添加百度站内搜索
生成搜索引擎账号、脚本以及安装脚本的大致过程如下,
- 访问 http://zn.baidu.com/cse/home/index
- 注册百度用户
- 验证网站
- 生成选择框样式
注意,如果是使用自己网站自定义的搜索框,这里要选择“使用网站已有的搜索框样式”; - 设置搜索范围
百度生成与域名相关的代码
注意,该代码只有在于域名相关的网站上才能运行否则;注意,这里给出了两段需要添加的代码将 id=”bdcsMain” 添加到 <form> 中的 <input> 标签上
1
2
3
4<form>
<label>Search</label>
<input type="text" id="bdcsMain"><br>
</form>将下面生成的 <script/> 脚本添加到 body 的末尾
1
<script type="text/javascript">(function(){document.write(unescape('%3Cdiv id="bdcs"%3E%3C/div%3E'));var bdcs = document.createElement('script');bdcs.type = 'text/javascript';bdcs.async = true;bdcs.src = 'http://znsv.baidu.com/customer_search/api/js?sid=<youridnum>' + '&plate_url=' + encodeURIComponent(window.location.href) + '&t=' + Math.ceil(new Date()/3600000);var s = document.getElementsByTagName('script')[0];s.parentNode.insertBefore(bdcs, s);})();</script>
这段代码的作用是,搜索 id=”bdcsMain” 所在的 <form>,然后自动生成相关的 form action 和 sid 等关键值;如图
对应如何添加到 hexo 的 jacman 中
- _config.yml 文件中,将 baidu_search 设置为 enable 为 true;
注意,id 和 site 属性统统可以不要,建议直接注释掉;因为最新的 baidu_search 会自动的在 <form> 标签中生成对应的 id 和 site; 修改 /theme/jacman/layout/_partial/after_footer.ejs,在末尾添加
1
<script type="text/javascript">(function(){document.write(unescape('%3Cdiv id="bdcs"%3E%3C/div%3E'));var bdcs = document.createElement('script');bdcs.type = 'text/javascript';bdcs.async = true;bdcs.src = 'http://znsv.baidu.com/customer_search/api/js?sid=<youridnum>' + '&plate_url=' + encodeURIComponent(window.location.href) + '&t=' + Math.ceil(new Date()/3600000);var s = document.getElementsByTagName('script')[0];s.parentNode.insertBefore(bdcs, s);})();</script>
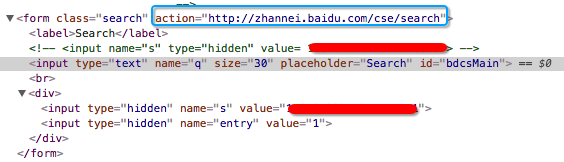
修改 /theme/jacman/layout/_partial/header.ejs,找到相关的 baidu_search 的代码段,作如下的修改该
1
2
3
4
5<form class="search">
<label>Search</label>
<!-- <input name="s" type="hidden" value= <%= theme.baidu_search.id %> > -->
<input type="text" name="q" size="30" placeholder="<%= __('search') %>" id="bdcsMain"><br>
</form>配置好了以后,该 <form> 标签内部会自动生成相关的 action 和 sid,提交到 baidu 站点上 search 上进行搜索了;类似于 http://zhannei.baidu.com/cse/search?q=spring+boot&s=<yoursid>&entry=1
让百度收录网站
添加百度搜索以后,其实网站就收录了,不过如果担心迟迟没有收录,可以在这里提交 http://www.baidu.com/search/url_submit.html;
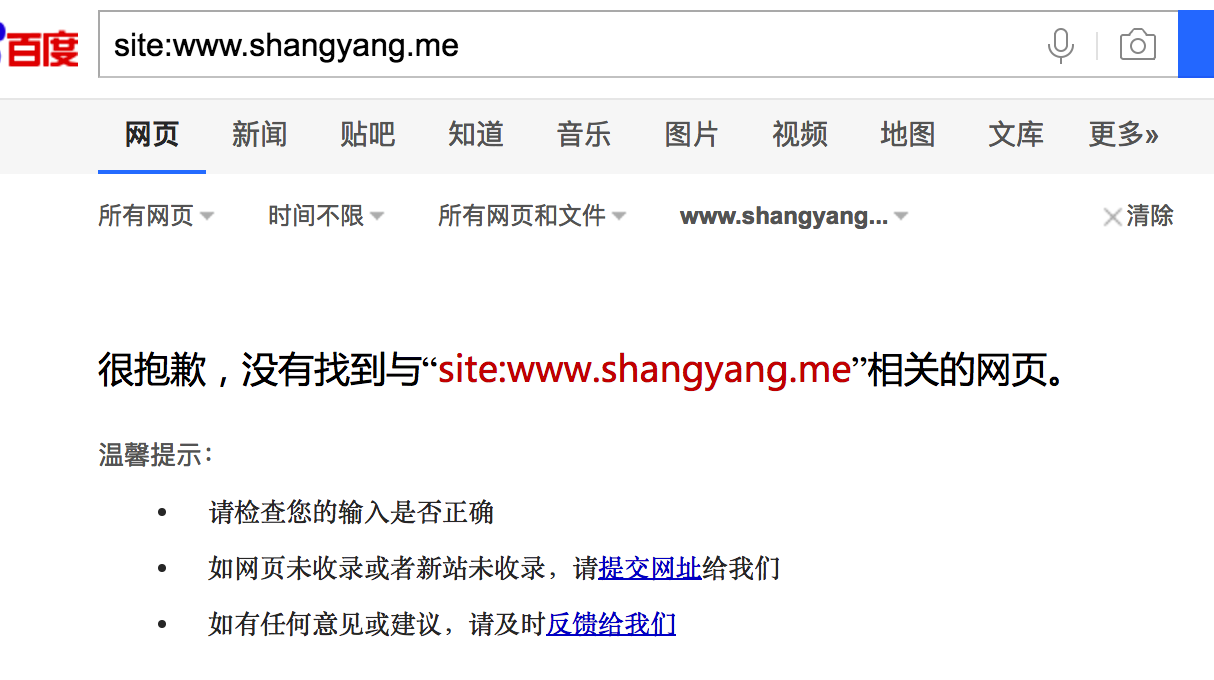
如何查看自己的网站是否已经被收录?打开百度,在搜索栏中输入 site:www.12306.cn 可以查看该网站是否已经被百度收录…
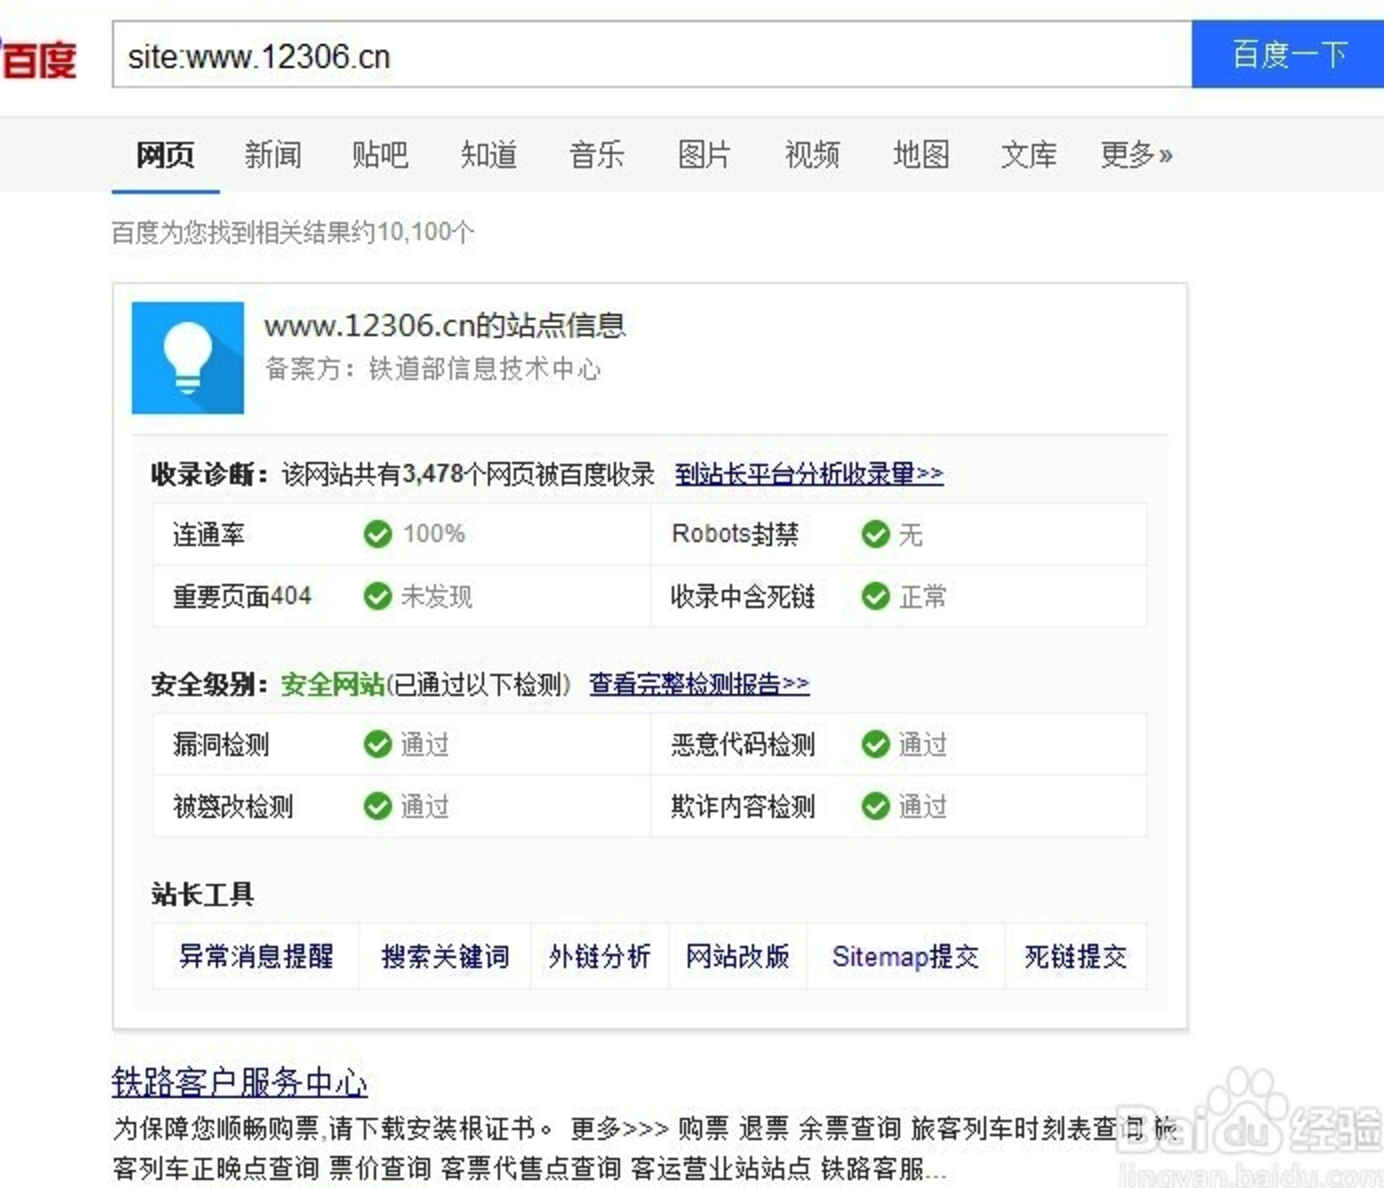
如果还没有被收录,会是返回如下的结果;
不过使用上面这种方式,一是生效时间很长,而且有可能会被百度给忽略;最好的方式,是通过主动推送的方式进行,一共包括三种方式,1、 主动推送(实时) 2、自动推送 3、sitemap;这里主要讲解下前两种方式,第三种是在网页上手动提交
主动推送(实时)
调用接口地址 http://data.zz.baidu.com/urls?site=www.shangyang.me&token=yourtoken
使用 curl 脚本提交,将所有要提交的网址写入本地文件 urls.txt 中,然后执行1
$ curl -H 'Content-Type:text/plain' --data-binary @urls.txt "http://data.zz.baidu.com/urls?site=www.shangyang.me&token=BuMCTlxeV6fTFaVR"
自动推送
这种方式主要是将推送脚本添加在网页的源代码中,1
2
3
4
5
6
7
8
9
10
11
12
13
14<script>
(function(){
var bp = document.createElement('script');
var curProtocol = window.location.protocol.split(':')[0];
if (curProtocol === 'https') {
bp.src = 'https://zz.bdstatic.com/linksubmit/push.js';
}
else {
bp.src = 'http://push.zhanzhang.baidu.com/push.js';
}
var s = document.getElementsByTagName("script")[0];
s.parentNode.insertBefore(bp, s);
})();
</script>加入的路径 /theme/jacman/layout/_partial/after_footer.ejs
为了能够让百度自动收录,自己还写了一个 hexo plugins hexo-my-plugins-submit-to-search-engines
坑
以为万事大吉,等着让百度来收录了,可是迟迟一周过去了,还是没有被收录;结果使用百度的抓取诊断工具来测试,总是抓取失败,错误是拒绝访问,而且发现映射的 Github IP 地址是可以的,可以访问;
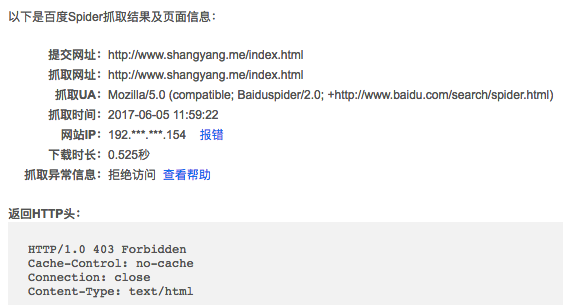
从爬虫的行为上来分析,可以看到,它多半是直接根据 IP 地址进行爬取的,而如果是直接根据 Github 的 IP 地址来爬取,一定会出现错误,因为少了根据域名路由转发的功能,最终导致爬取失败;
如何让 github 绑定私人域名,参考 github 域名重定向 部分内容;
最后,无奈,只好在自己的阿里云服务器上搭建自己的私人博客网站了;这里涉及到 deploy 到私人服务器上的问题,参考部署 sftp 小节;
结果,将域名映射到私人的 IP 地址以后,爬取成功;
如何让百度分享支持 https
百度分享的协议只支持 http,如果是 https 的站点是不能够使用的,现在唯一看到可以现成拿来使用的就是该篇文章 https://www.hrwhisper.me/baidu-share-not-support-https-solution/ 中所介绍的 baiduShare github 项目,它的实现思路非常简单,但是工作量巨大,就是将但凡 baidu share 用到的文件统统缓存到(拷贝)本地,这样,https 站点就不用发起 http 请求去远程获取了了;修改也很简单,
- 将 baiduShare 的源码包 /static/* 直接放到 web root 目录中,
然后将 baidu 相关的 domain 去掉就可以了,
1
.src='http://bdimg.share.baidu.com/static/api/js/share.js?v=89860593.js?cdnversion='+~(-new Date()/36e5)];</script>
修改成,
1
.src='/static/api/js/share.js?v=89860593.js?cdnversion='+~(-new Date()/36e5)];</script>
注意,这里的目录 /static/ 目录不能随便更改,因为 baiduShare 中的源码中将 /static/ 设置为了绝对路径,如果要改,必须将 /static/ 名称痛痛痛改掉
遗憾的是,将上述的办法部署到 hexo 中老是出错,Uncaught SyntaxError: missing ) after argument list 导致始终不成功,但是在我的其它 web 工程中却没有问题,应该是 hexo 本身的问题吧…
https://www.google.com/webmasters/tools/submit-url?continue=/addurl
https://www.google.com/webmasters/
bing
https://www.bing.com/toolbox/webmaster
管理台登录:https://www.bing.com/webmaster/home/
360
http://info.so.360.cn/site_submit.html
常用技巧
Image
1 | {% img [class names] /path/to/image [width] [height] [title text [alt text]] %} |
Link
Inserts a link with target=”_blank” attribute.
1 | {% include_code [title] [lang:language] path/to/file %} |
Include Posts
Include links to other posts.
1 | {% post_path slug %} |
Include Assets
1 | {% asset_path slug %} |
更多内容,参考 hexo Tag Plugins
About 页面
两种实现方式
- 在 source 文件夹下新建 about 文件夹,在 about 文件夹下新建 index.md
直接使用hexo new page 命令:
1
$ hexo new page about
最终会生成 #1 的的内容
编辑 index.md1
2
3
title: about
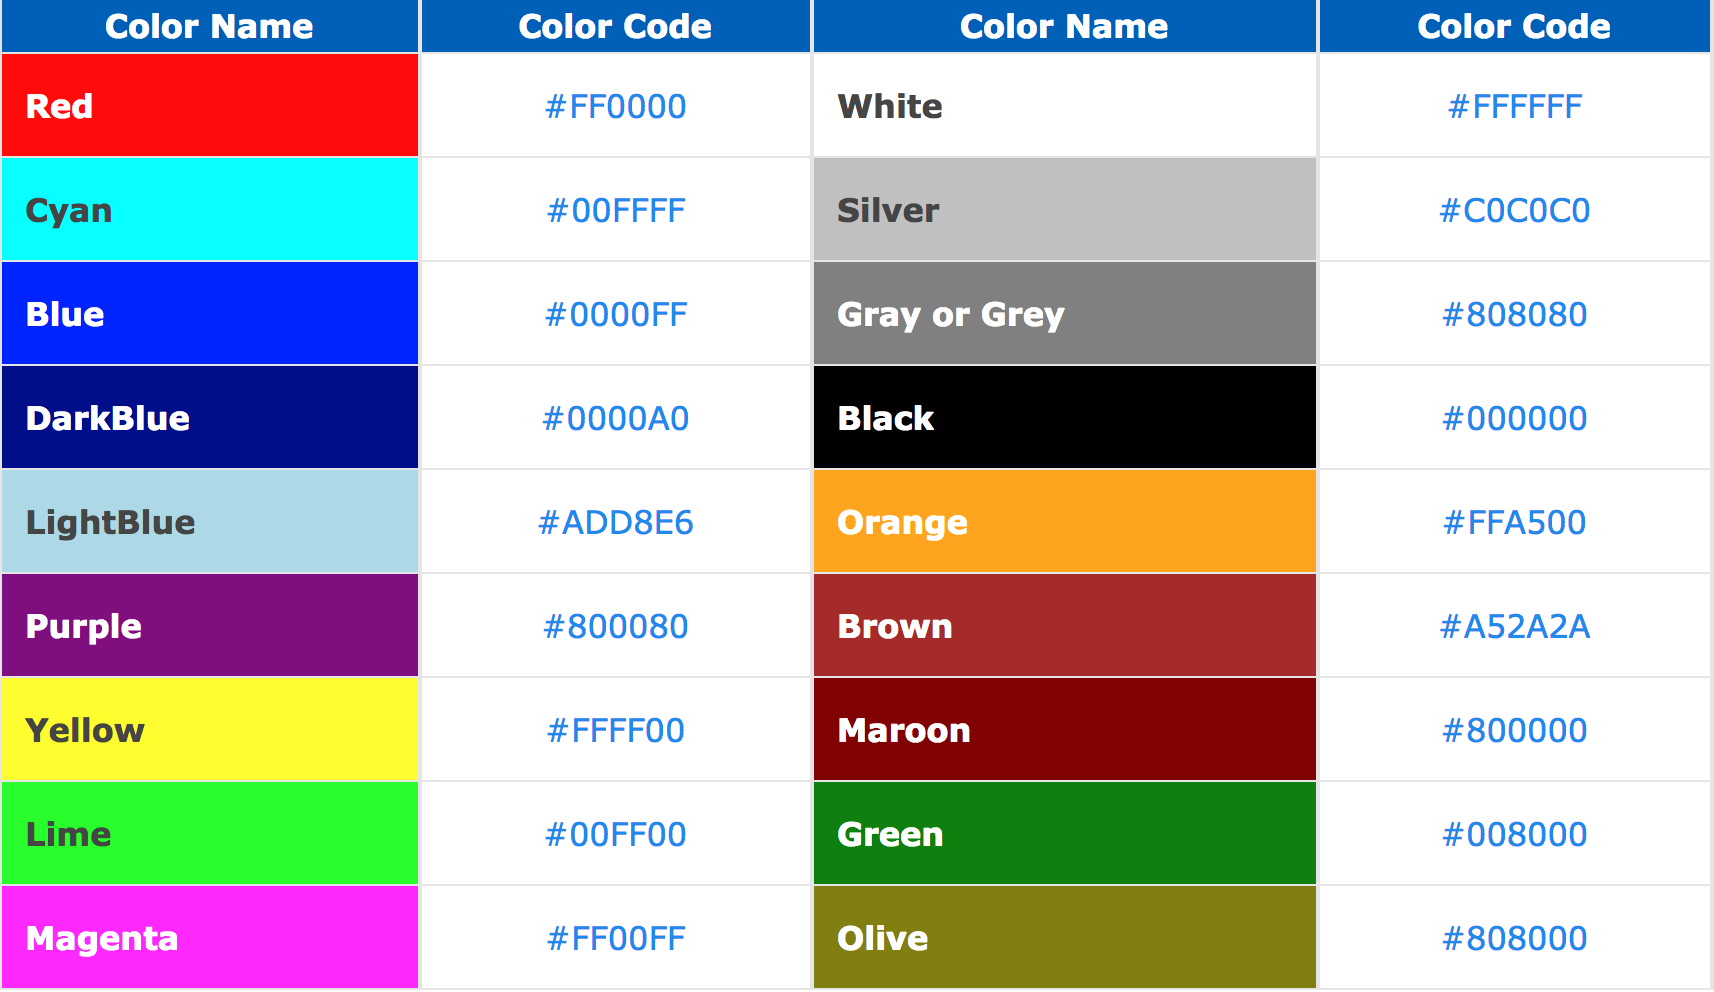
Html Color 表
如何设置置顶功能
参考:http://blog.csdn.net/qwerty200696/article/details/79010629
首先,卸载原有的 hexo-generator-index,然后再安装 hexo-generator-index-pin-top,1
2$ npm uninstall hexo-generator-index --save
$ npm install hexo-generator-index-pin-top --save
然后,主要在 Front-matter 中添加 top: true 即可,比如1
2
3
4
5
6
7
8
9
10
11
12
title: Spring Core Container 源码分析三:Spring Beans 初始化流程分析
tags:
- Spring
categories:
- 计算机科学与技术
- Spring
- Framework
- Core Container
date: 2017-04-01 09:54:33
top: true
然后在博文中插入置顶功能,主要修改 themes/jacman/layout/_partial/post/header.ejs 然后添加置顶代码,1
2
3
4
5
6
7
8
9
10<!-- 作者姓名 -->
<p class="article-author">
<!-- 置顶 -->
<% if(page.top){ %>
<font color=7D26CD>置顶</font>
<span class="post-meta-divider">|</span>
<% } %>
...
</p>
注意,Jacman 使用变量是 page,大多数其他的模板使用的是 post,注意区别;
如果是 Next,修改 themes/next/layout/_macro/post.swig 文件,定位到<div class="post-meta">标签下,直接插入如下代码:1
2
3
4
5{% if post.top %}
<i class="fa fa-thumb-tack"></i>
<font color=7D26CD>置顶</font>
<span class="post-meta-divider">|</span>
{% endif %}
修改头像的展示样式
修改 /themes/jacman/layout/_partial/header.ejs
Errors
Abort trap 6
升级 Nodejs 以后,运行一段时间以后会出现这样的错误,1
2
3
4
5
6$ hexo server --draft
(node:16793) [DEP0061] DeprecationWarning: fs.SyncWriteStream is deprecated.
INFO [hexo-math] Using engine 'mathjax'
INFO Start processing
INFO Hexo is running at http://localhost:4000/. Press Ctrl+C to stop.
Abort trap: 6
Google 了一下,大部分的分析都认为是内存不足造成的,https://github.com/hexojs/hexo/issues/1831 https://github.com/hexojs/hexo/issues/2165 建议调整 hexo 启动的内存大小,如何设置参考 https://github.com/hexojs/hexo/issues/2165
1 | $ cd /usr/local/lib/node_modules/hexo-cli/bin |
1 | $ sudo vim hexo |
将内容1
2
3
4
5#!/usr/bin/env node
'use strict';
require('../lib/hexo')();
修改为1
2
3
4
5#!/usr/bin/env node --max_old_space_size=768
'use strict';
require('../lib/hexo')();
这样,设置了最大的可使用的内存空间为 768M
迁移至 Next
如何添加 baidu 和 Google 统计
在 Next 中没有通过默认配置的方式来进行百度和 Google 的统计,通过自己摸索,发现可以直接添加到 head.swig 中去,next/layout/_partials/head/head.swig,将代码直接添加到1
2
3
4{# Export some HEXO Configurations to Front-End #}
<script>
....
</script>
的 <script> 标签中即可;
迁移畅言
迁移畅言目前是我遇到的最大的坑,迁移后发现之前文章中有的评论丢失了;经过几番周折,发现,是畅言 sid 惹的祸,把之前的 sid 加上就可以了;不过要注意的是,默认情况下,Next 是按照它自己的算法来添加 sid 的,因为之前我是按照文章的 title 作为 sid 的,所以,需要做如下的修改,修改 comments.swig 文件,将原来的 changyan 部分的代码修改为如下内容,1
2
3
4{% elseif theme.changyan.enable and theme.changyan.appid and theme.changyan.appkey %}
<div class="comments">
<div id="SOHUCS" sid="{{ page.title }}"></div>
</div>
当然,上述代码能够启用首先在于在 next 的 _config.xml 中启动了畅言;这算是不大不小的一个坑,花费了我很多时间去调研;
不过,由此,我得要注意了,因为我使用了文章的标题作为了 sid,而 sid 又和文章的评论有着关键的映射关系,不能随意更滑,所以就导致我的文章标题不能随便的变化了,否则评论信息都不能加载了!
调整字体
https://theme-next.iissnan.com/faqs.html 中介绍了如何更改字体,主要是修改 source/css/_variables/custom.styl 文件,但是,按照官网的知道,我设置了 $font-size-base 的参数,但是在我的 15 寸的 laptop 上,字体仍然是默认的 16px,后来发现,Next 的响应式在 1200 px 屏幕尺寸上默认的强制的将字体设置为了 16px,因此在大分辨率下,只设置$font-size-base是不够的,还需要设置$font-size-large属性,这样,才能在屏幕分辨率大于 1200px 下也能生效,下面是我的配置,1
2
3$font-size-base = 14px;
$font-size-large = 15px;
$code-font-size = 13px;
这样设置的目的是,在小的尺寸上依然是 14px,只有在 > 1200px 的屏幕下才使用 15px,这样覆盖掉默认的 16px;$code-font-size是设置代码的字体大小,是一个同一只,不受屏幕尺寸的影响;注意,一般设置以后就生效了,但是有时候可能需要执行hexo clean才能生效;
文章页如何展示多级目录
Hexo Next 现在的设计很好,当滚动到或者点击某个目录的时候,下一级的目录才自动展开,但是,当文档内容非常丰富的时候,这种默认的展示方式在页面刚点开的时候,所展示的信息过少,那么有没有办法,比如默认展开头两级目录呢?Hexo Next 目前并没有默认提供这样的设置,需要添加自定义样式,next/source/css/_custom/custom.styl
1 | .post-toc .nav .nav-level-1>.nav-child { |
如果想要默认展示所有的目录层级,添加如下的样式,1
2
3.post-toc .nav .nav-child {
display: block;
}
https://github.com/iissnan/hexo-theme-next/issues/710